Retter.io
Create Your First Project
Here is the step by step instructions to create, deploy and run your first project on Rio platform.
You can create a project through the developer console. However, when you create your project that way, you will need a manual effort to make it available in your favorite IDE tool. Instead of that, you can make use of the CLI tool to initiate a project with the default template.
Let's start with setting up your development environment then.
Getting Familiar With The Developer Console
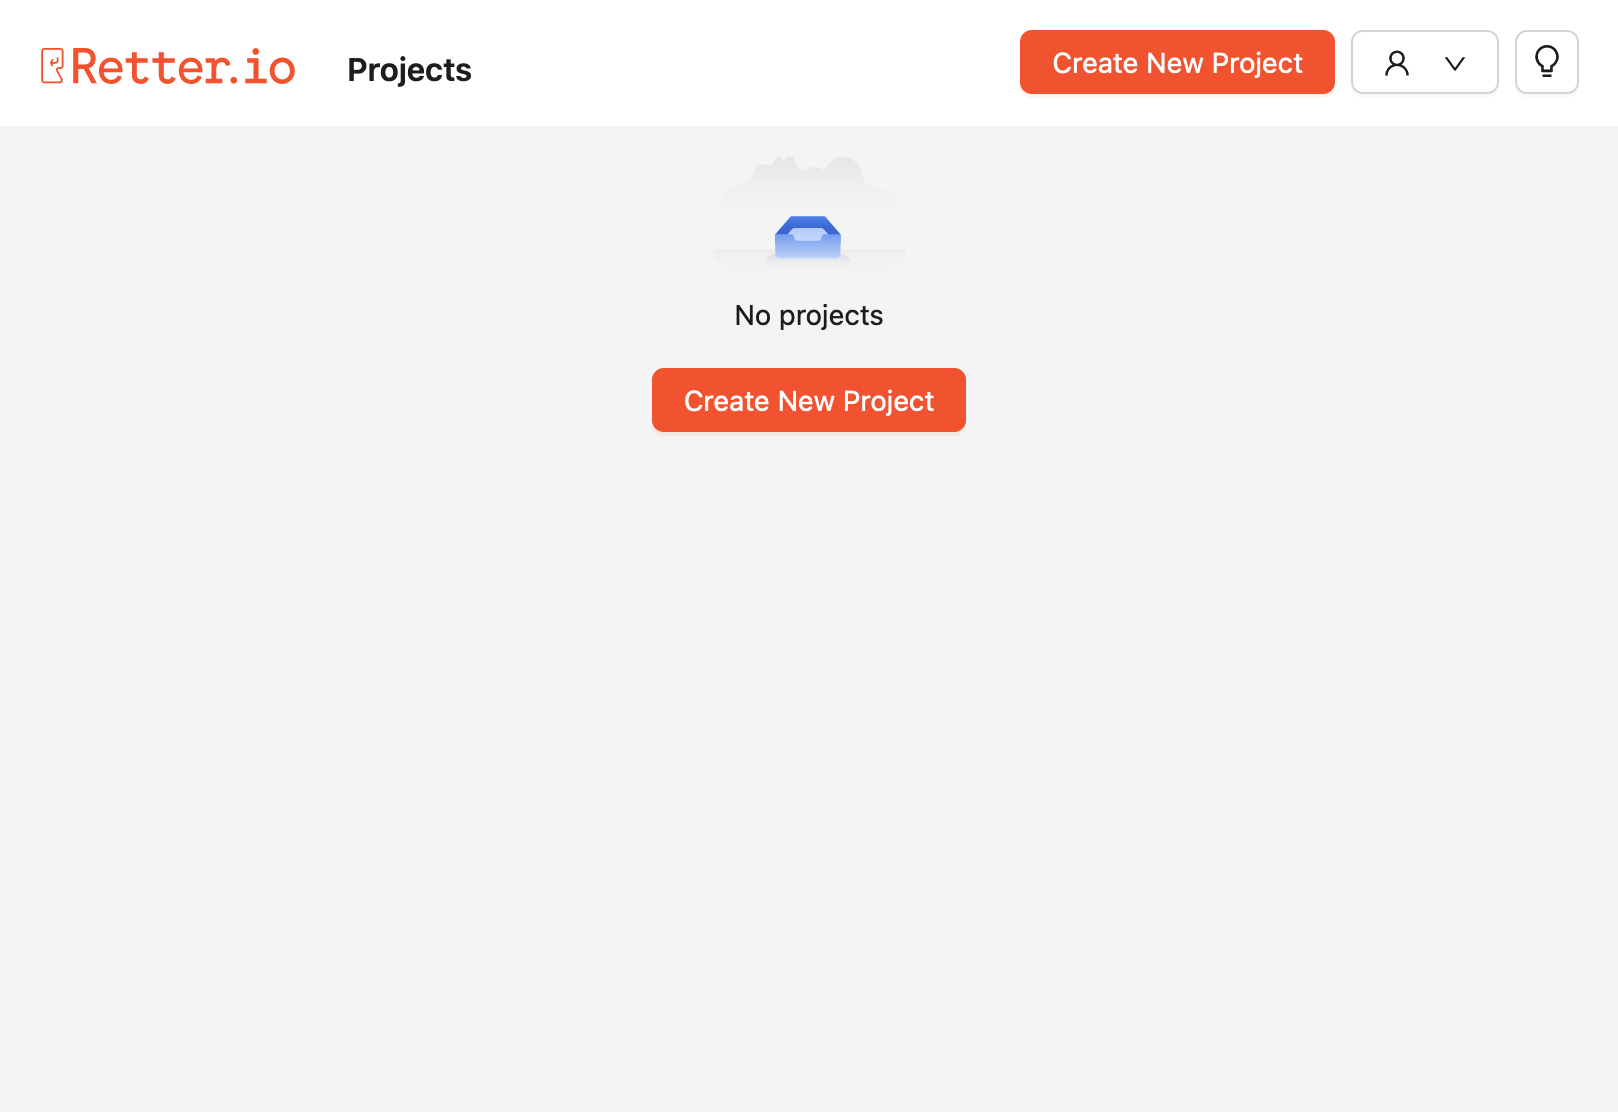
As a Rio developer, you already are invited to a Rio-enabled cloud account. Therefore, you have access to sign in to the Rio developer console. Home page shows all the projects that you have access to.
If you click the little guy on the top right corner of the screen, a small menu will show up. Then, you can click the menu item called Settings.
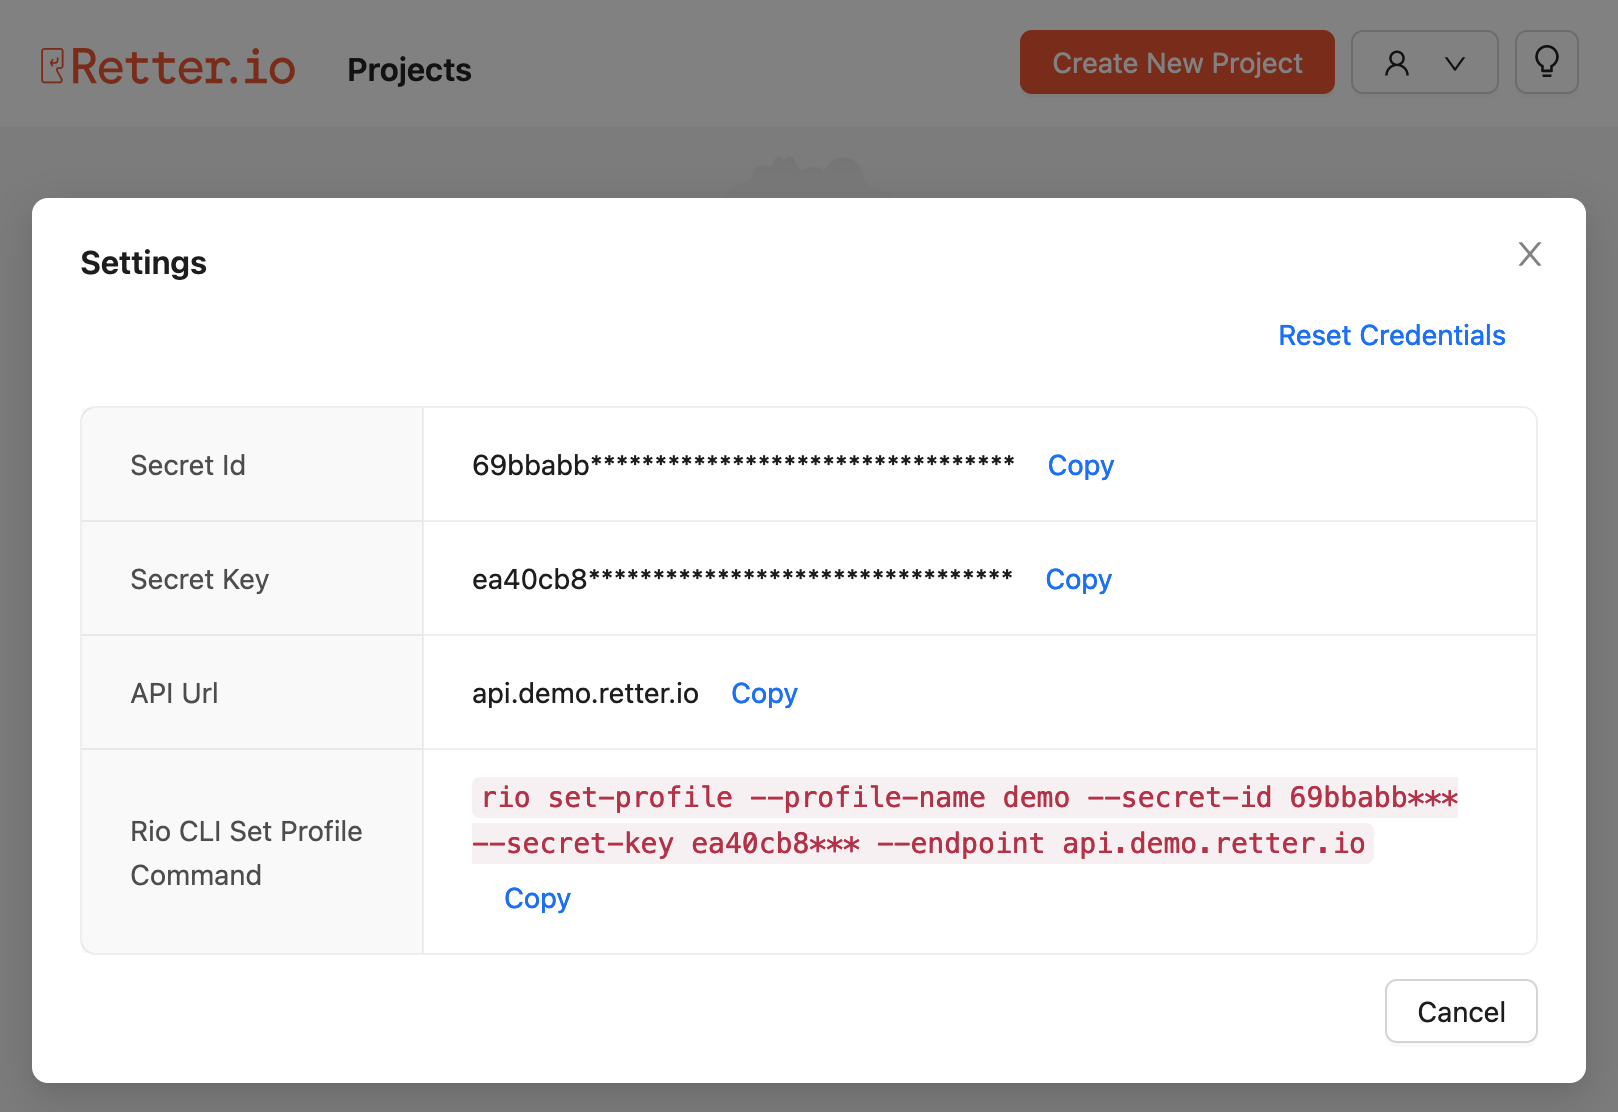
On the Settings dialog, you can see your credentials and the instruction that explains how to use them with the CLI tool. However, to be able to make use of these credentials, you need to install the CLI tool first.
Installing The CLI
You can install the CLI tool by running the following command in your terminal.
npm install -g @retter/rio-cli
If you have any trouble installing the CLI tool, please check CLI page for more details.
Setting Up Your Developer Profile
Once you have the CLI tool installed, you can set your profile with your credentials by running the following command in your terminal.
rio set-profile --profile-name PROFILE_NAME \
    --secret-id YOUR_SECRET_ID \
    --secret-key YOUR_SECRET_KEY \
    --endpoint api.RIO-ENV-ALIAS.retter.io
You should replace YOUR_SECRET_ID and YOUR_SECRET_KEY with your actual credentials from the Settings dialog. The endpoint parameter should be the address of your Rio environment. At last but not least, you can use any name you want as the name parameter for your profile.
You can copy that command from the Settings dialog directly and run it in your terminal without any change required.
Initiating A Project
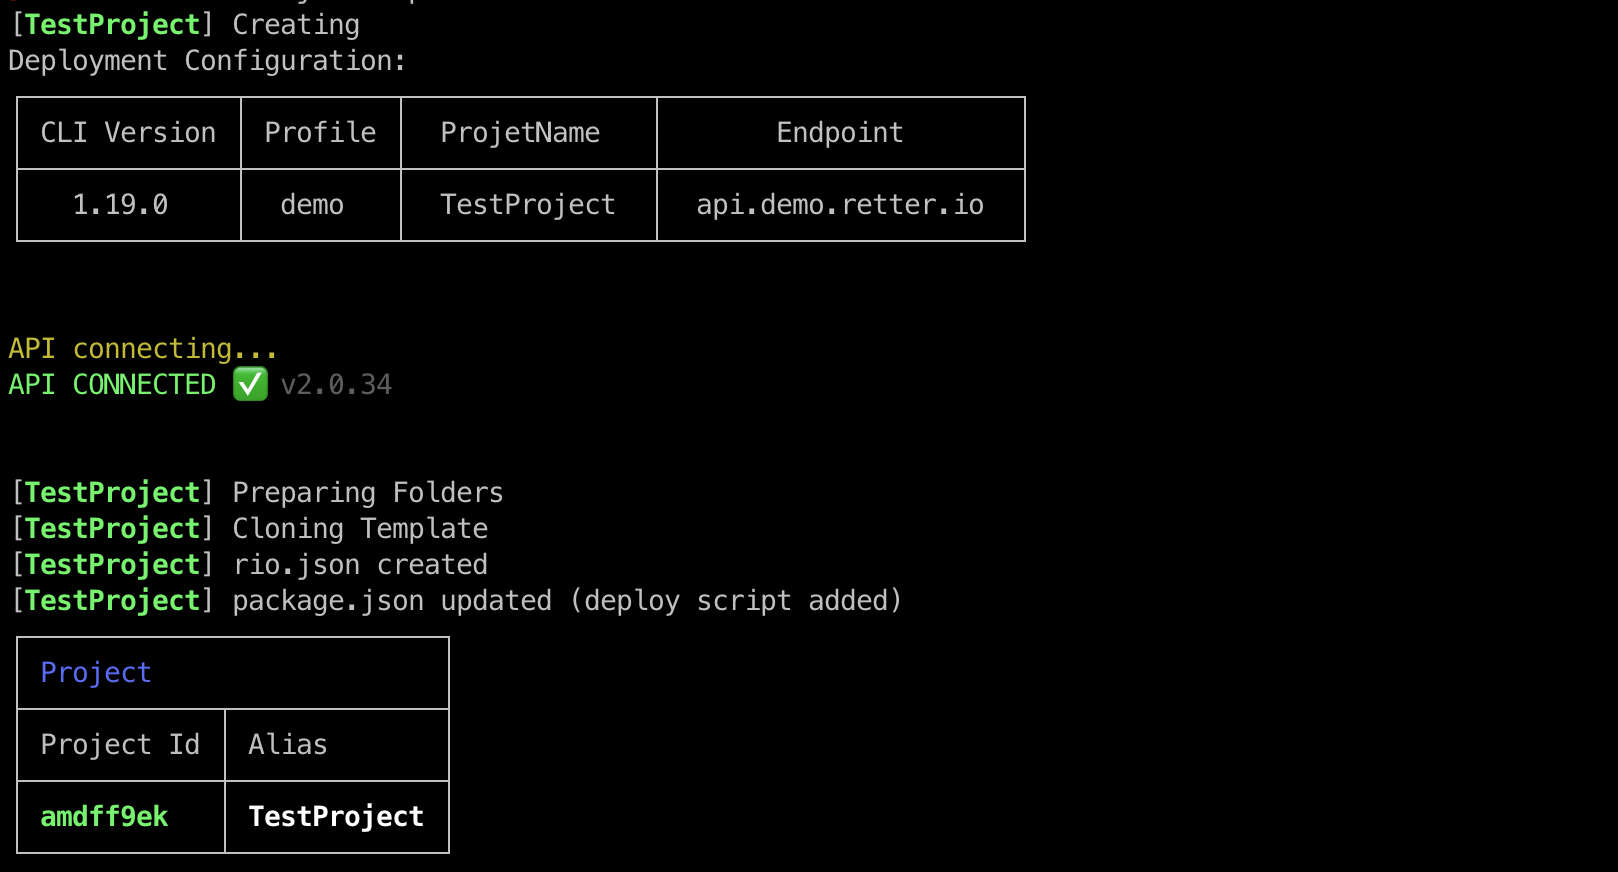
Now, you are ready to interact with the Rio environment from your local computer on your behalf. You can run the following command to create your first project.
rio init TestProject --profile PROFILE_NAME


cd TestProject
npm install
Getting Familiar With The Project Structure
Once the command completed successfully, you can open the project folder with your favorite IDE tool.
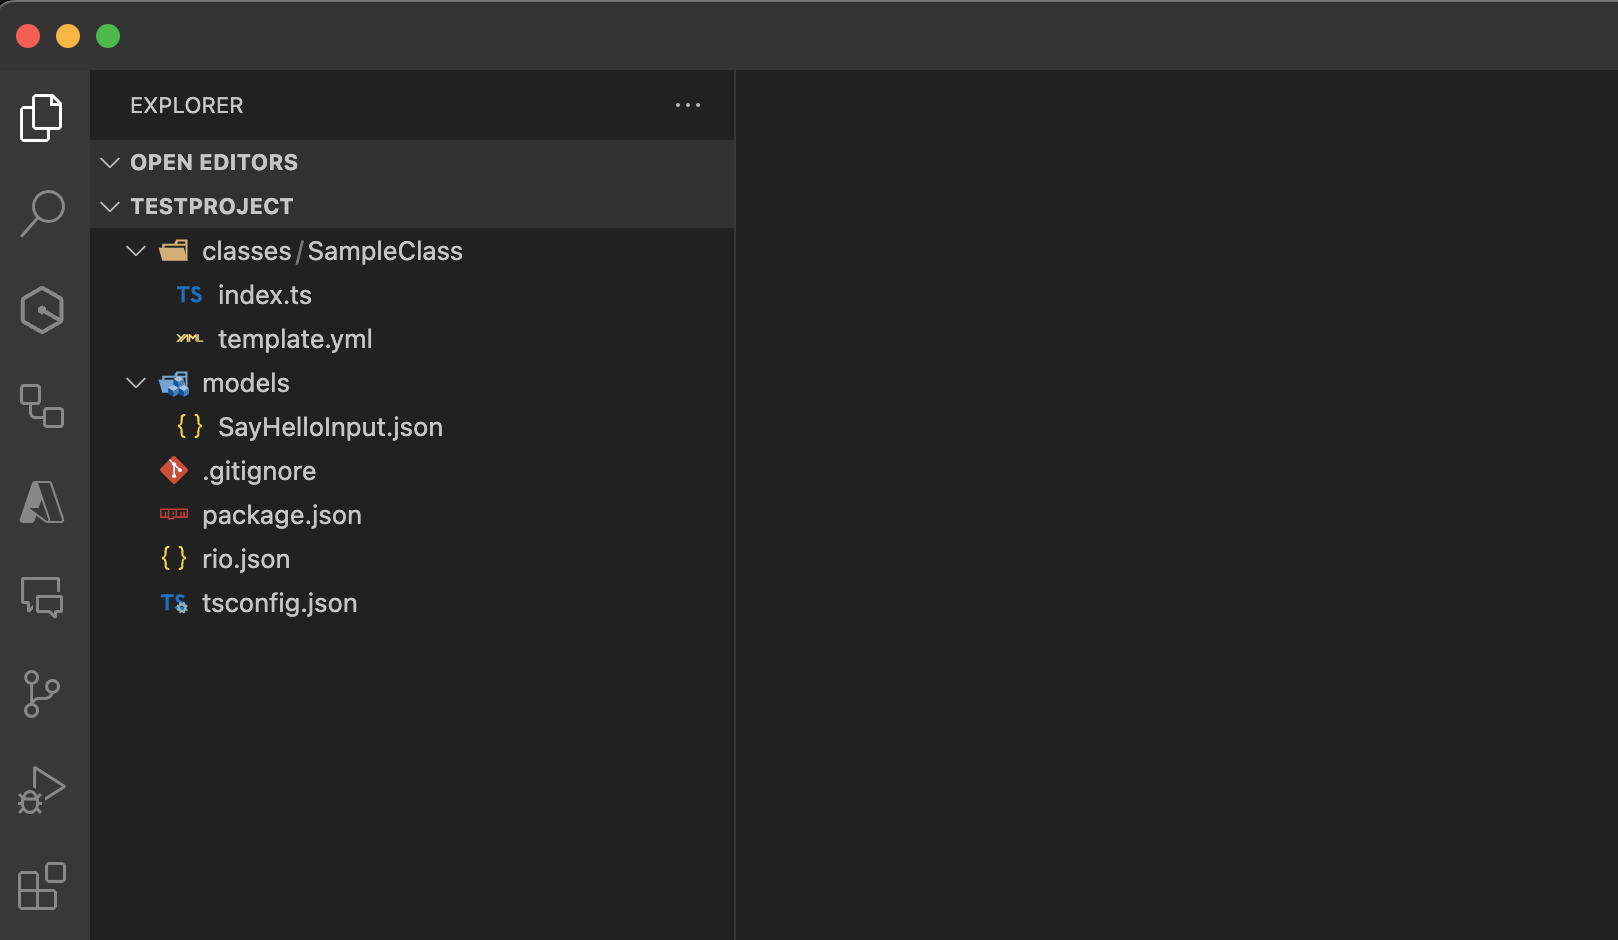
As you can see in the screenshot above, there are two folders in the default project template: classes and models. The classes folder is the place that you keep your class definitions and implementations. On the other hand, you are going to keep your model definitions under models folder.
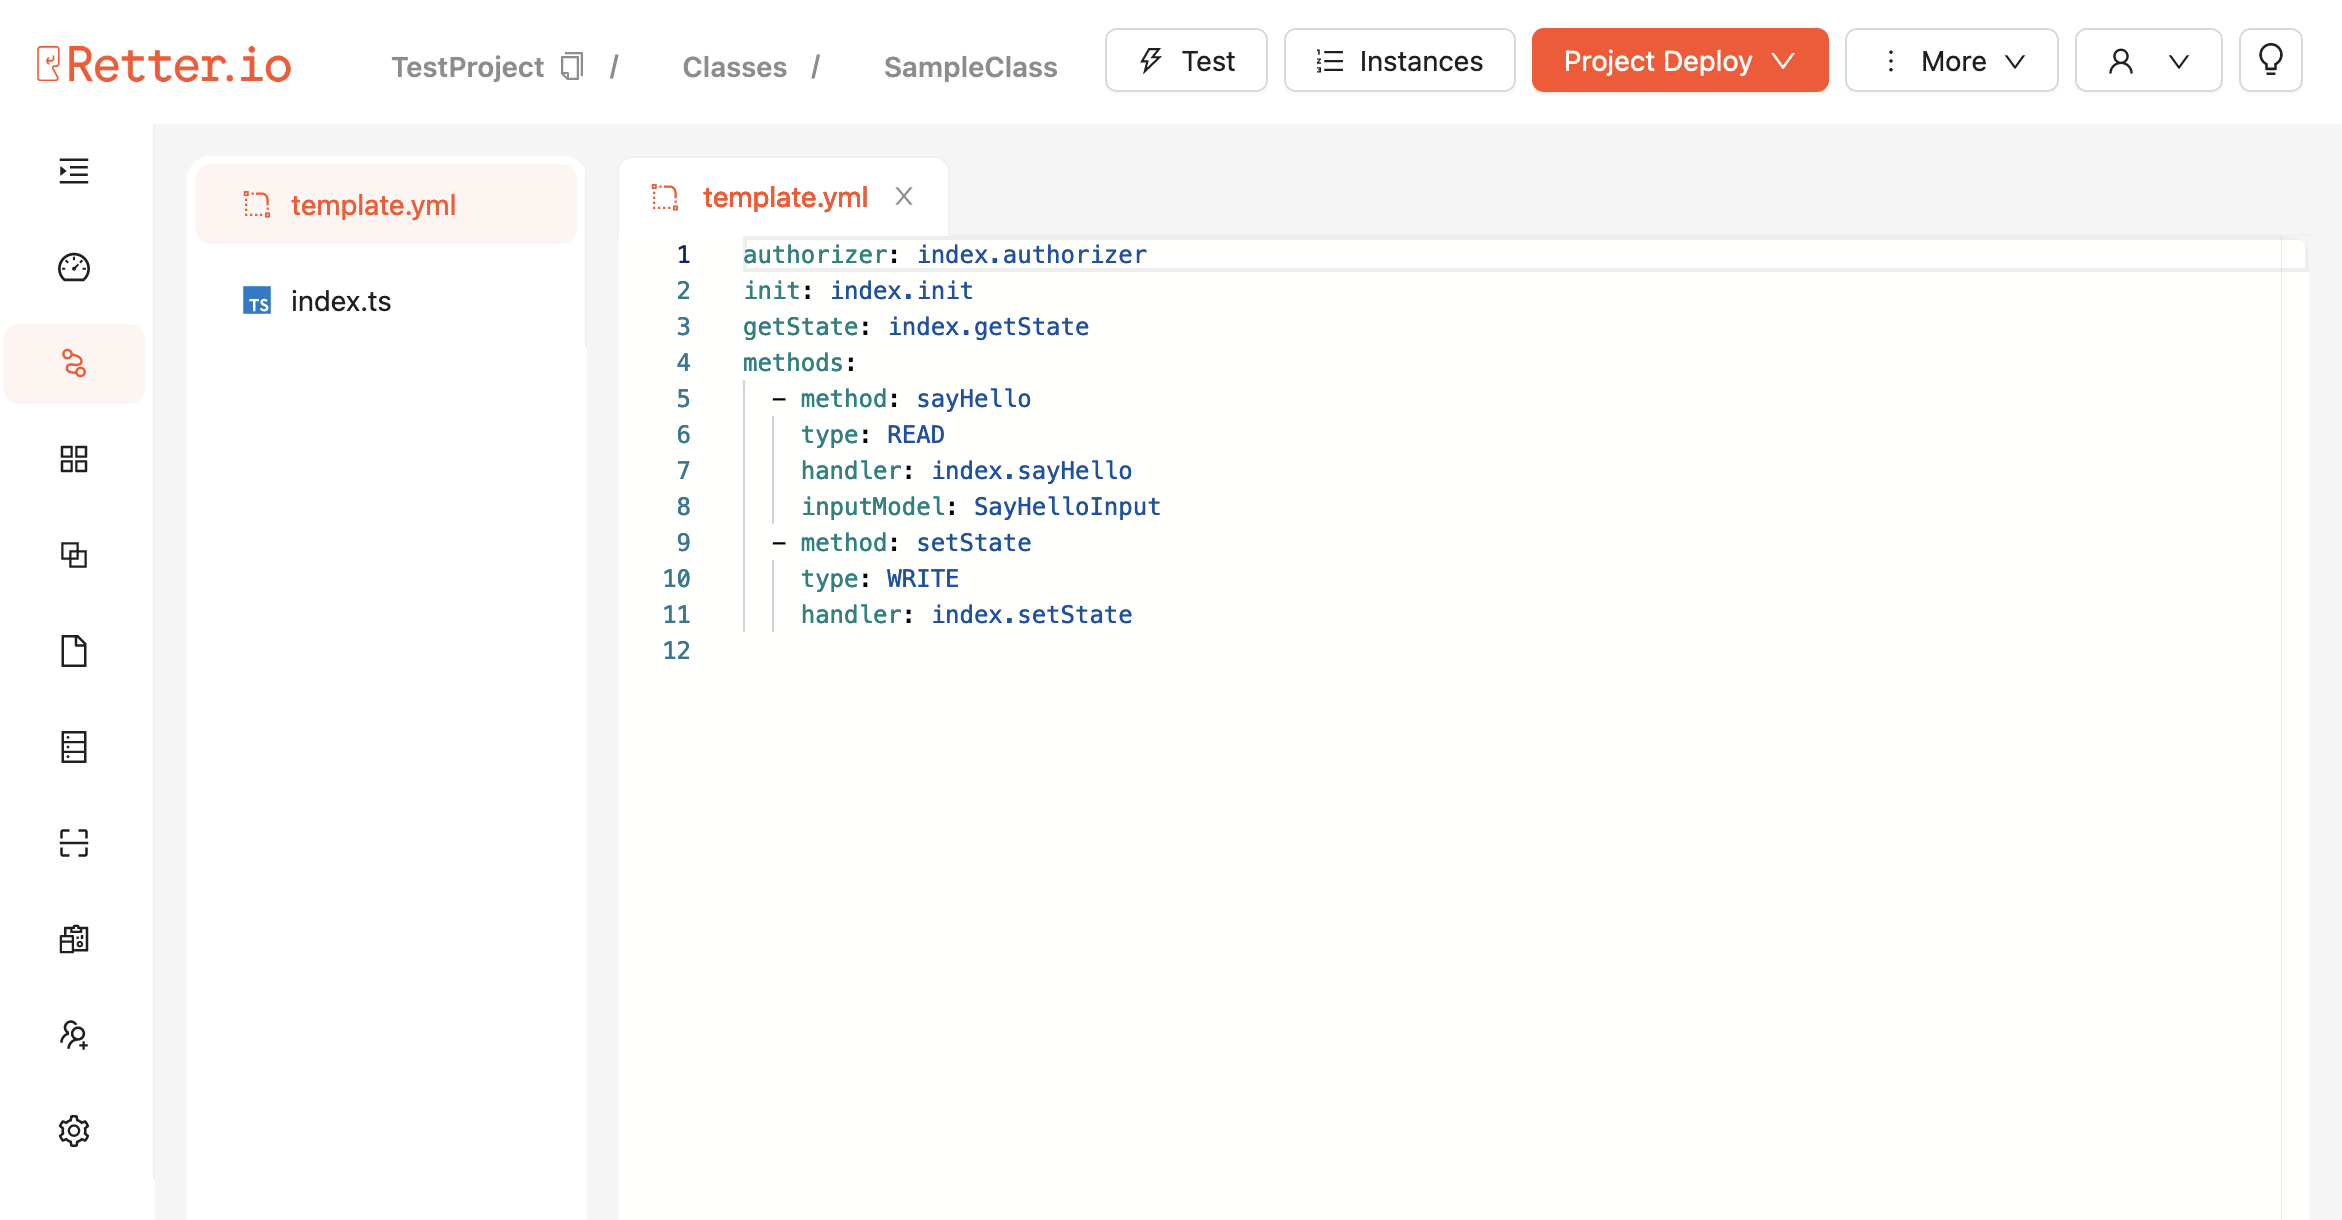
There is already a sample class under classes folder. Let's review the SampleClass:
We have a mandatory class definition file called template.yml.
authorizer: index.authorizer
init: index.init
getState: index.getState
methods:
  - method: sayHello
    type: READ
    handler: index.sayHello
  - method: setState
    type: WRITE
    handler: index.setState
As you can see in the template.yml file, there are multiple delegate methods defined already such as authorizer, init, getState and two method implementations: sayHello and setState. These are simple examples to show you how to use READ and WRITE method types.
For more information about template definitions, please check Template Reference section at the Classes page.
Authorizing The Requests
Let's continue to review the SampleClass with index.ts file. First, we have an authorizer method. As you can see in the Lifecycle of Delegate Methods section at the Classes page, authorizer delegate method gives you the access control over your class. You can decide who can or can't call your methods.
import RDK, { Data, Response } from '@retter/rdk';


const rdk = new RDK();


export async function authorizer(data: Data): Promise<Response> {
    const { identity, methodName } = data.context;
    if (methodName === 'setState' && identity === 'developer') return { statusCode: 204 };


    return { statusCode: 403 };
}
In this sample authorizer, all requests rejected with a 403 status code. Do not forget to fix this implementation to be able to call your methods while testing.
Implementing Delegate Methods
When you create a new instance from an existing class your init method would be called automatically by Rio core. In the sample init delegate implementation, we basically write a simple text into the public state which makes this information publicly available in a Rio environment.
For more information about states, please check Lifecycle of Delegate Methods section at the Classes page.
export async function init(data: Data): Promise<Data> {
    data.state.public = { message: 'Hello, World!' };
    return data;
}
There are two state-related delegate methods in the definition (template.yml) and implementation (index.ts) files: getState and setState. By their names, getState returns the required part of the state while setState overwrites it accordingly.
For more information about states, please check States section at the Classes page.
export async function getState(data: Data): Promise<Response> {
    return {
        statusCode: 200,
        body: data.state,
        headers: { 'x-rio-state-version': data.version.toString() }
    };
}


export async function setState(data: Data): Promise<Data> {
    const { state, version } = data.request.body || {};
    if (data.version === version) {
        data.state = state;
        data.response = { statusCode: 204 };
    } else {
        data.response = {
            statusCode: 409,
            body: {
                message: `Your state version (${version}) is behind the current version (${data.version}).`,
            },
        }
    }
    return data;
}
Defining Your Methods
At last but not least, we have one more method to review: sayHello. This method is simply reads a variable from state and sends it back as a response to the request.
For more information about method implementations, please check Method Data section at the Classes page.
export async function sayHello(data: Data): Promise<Data> {
    data.response = {
        statusCode: 200,
        body: {
            message: data.state.public?.message,
        },
    };
    return data;
}
Working With Models
On the request side, Rio can validate body as well as query string parameters. On the response side, Rio supports body and error validations.
Validator models can be defined as JSONSchema documents. Here is a simple example from the default codebase called SayHelloInput.yml.
{
  "type": "object",
  "properties": {
    "firstName": {
      "type": "string",
      "description": "The person's first name."
    },
    "lastName": {
      "type": "string",
      "description": "The person's last name."
    },
    "age": {
      "description": "Age in years which must be equal to or greater than zero.",
      "type": "integer",
      "minimum": 0
    }
  }
}
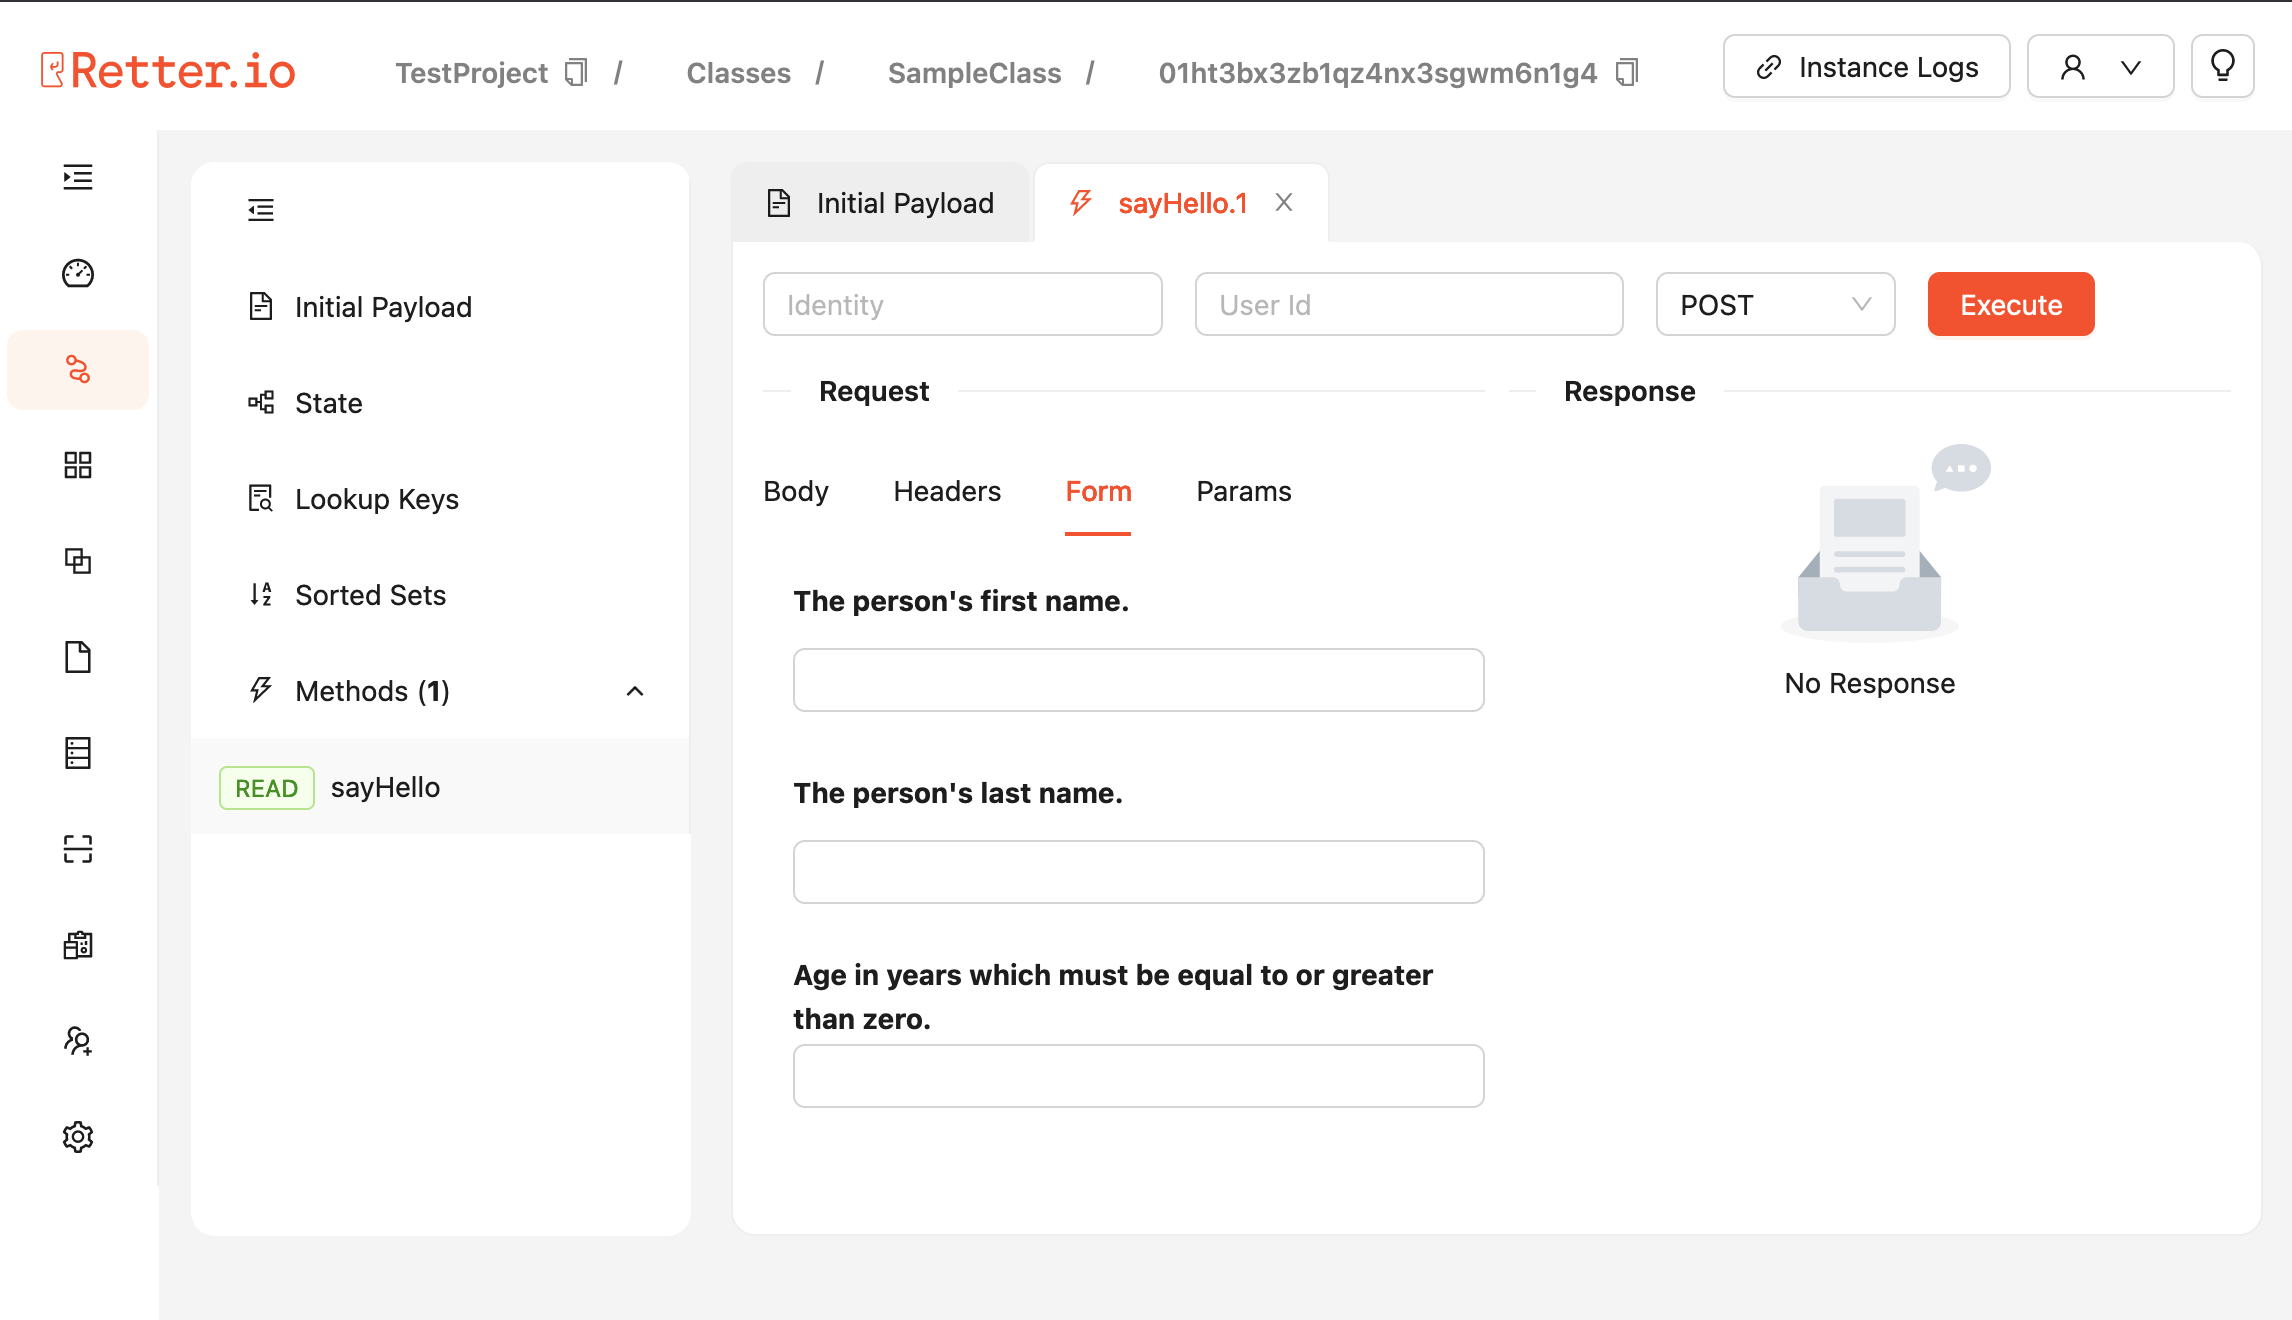
In this model, we expect 3 parameters: firstName, lastName and age. They are defined as specific data types with respected descriptions and none of them is required. However, as you can see in the project codebase, your sample input model has not been used anywhere.
You can add your model to one of your methods as in the following example:
authorizer: index.authorizer
init: index.init
getState: index.getState
methods:
  - method: sayHello
    type: READ
    handler: index.sayHello
    inputModel: SayHelloInput
  - method: setState
    type: WRITE
    handler: index.setState
For more information about how to set various validation models, please check Handler Model and Method Model sections at the Classes page.
Let's review the method implementation again and try to make use of the parameters.
export async function sayHello(data: Data): Promise<Data> {
    const { firstName, lastName, age } = data.request.body;
    const name = `${firstName} ${lastName}`
    data.response = {
        statusCode: 200,
        body: {
            message: `${name} is ${age} years old.`,
        },
    };
    return data;
}
Deploying The Project
Now, your sample application is ready to deploy. In the package.json file there is a npm script to make the deployment easily.
{
  ...
  "scripts": {
    "deploy": "rio d --p demo --pid PROJECT_ID --i"
  }
  ...
}
You can run the command in your terminal as following:
npm run deploy
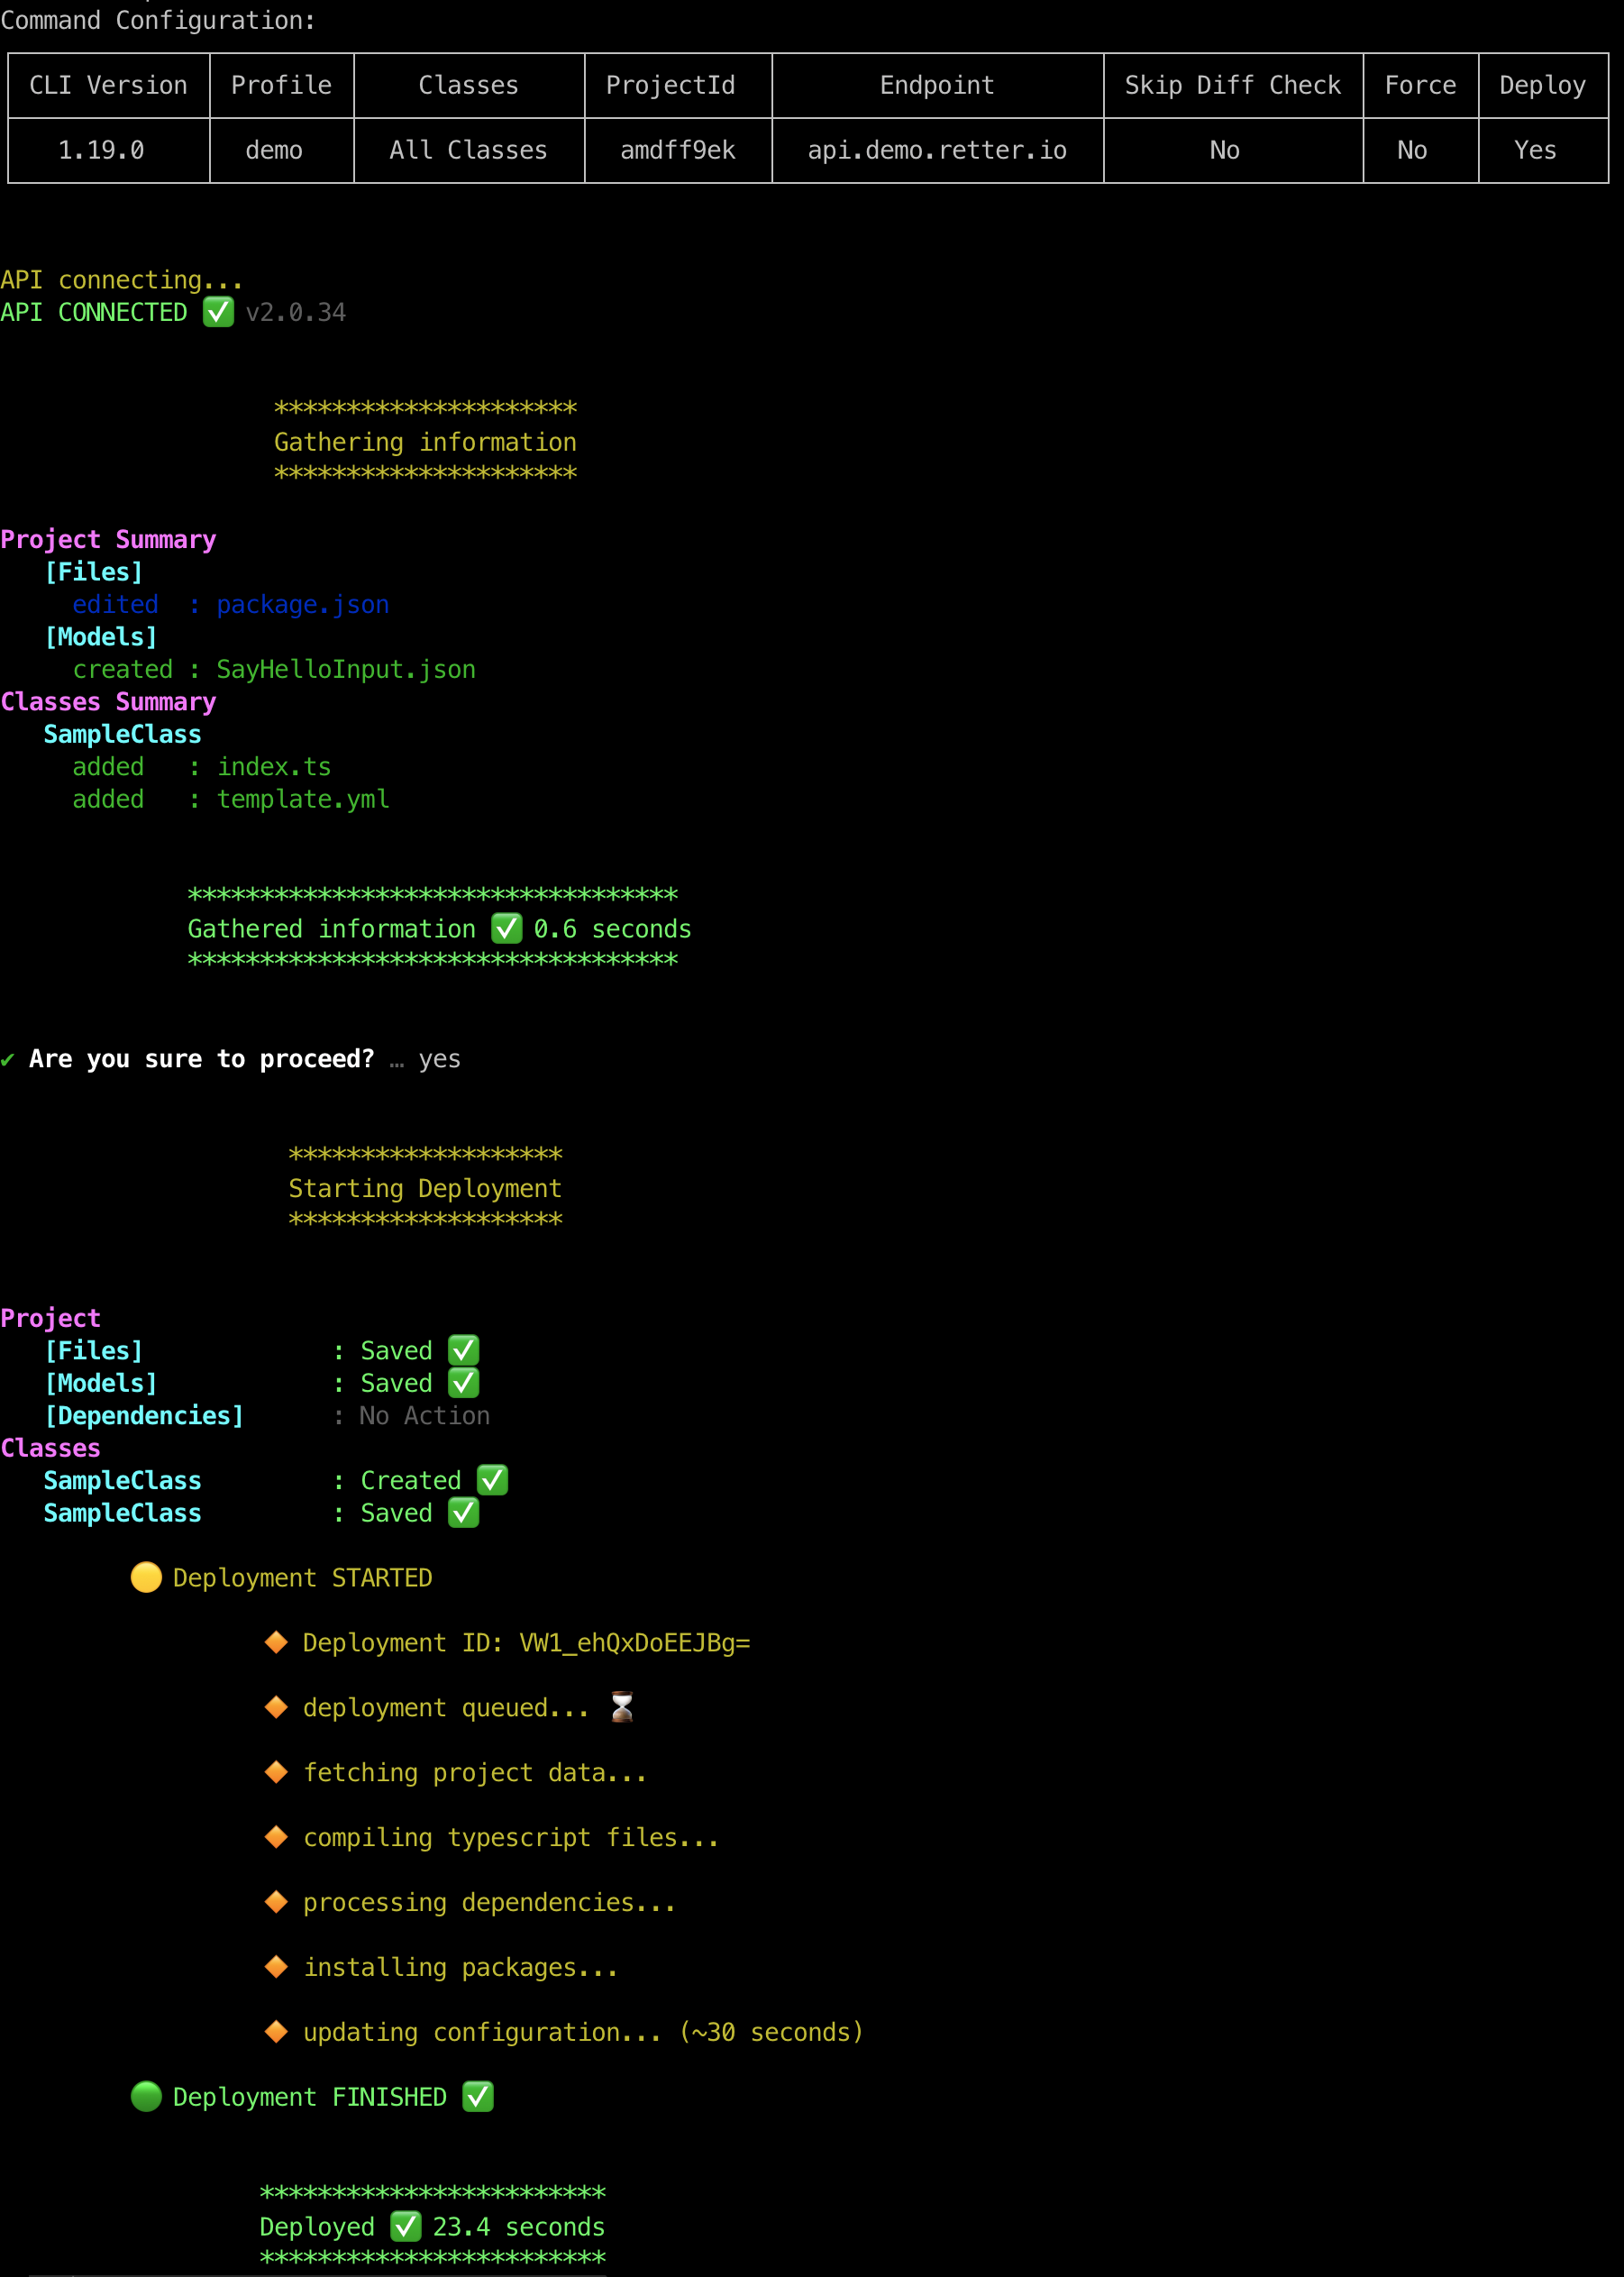
For more information about deployments, please check Deploying Your Project section at the CLI page.
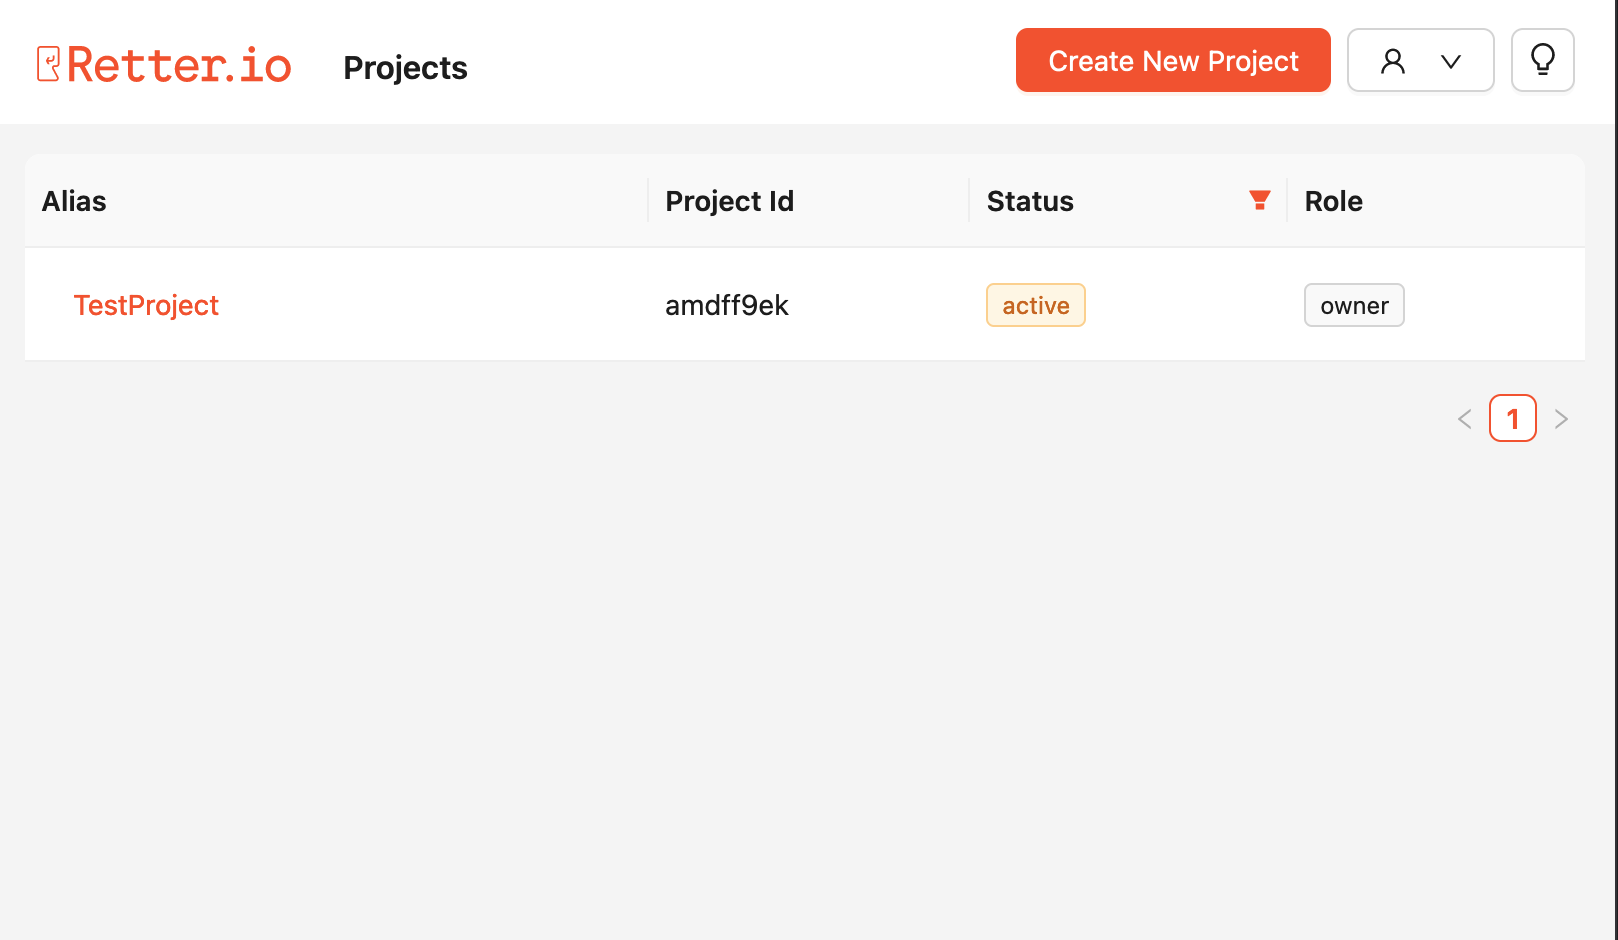
The Project On The Developer Console
When you create your project at the first time, you are able to see it on the Rio developer console.
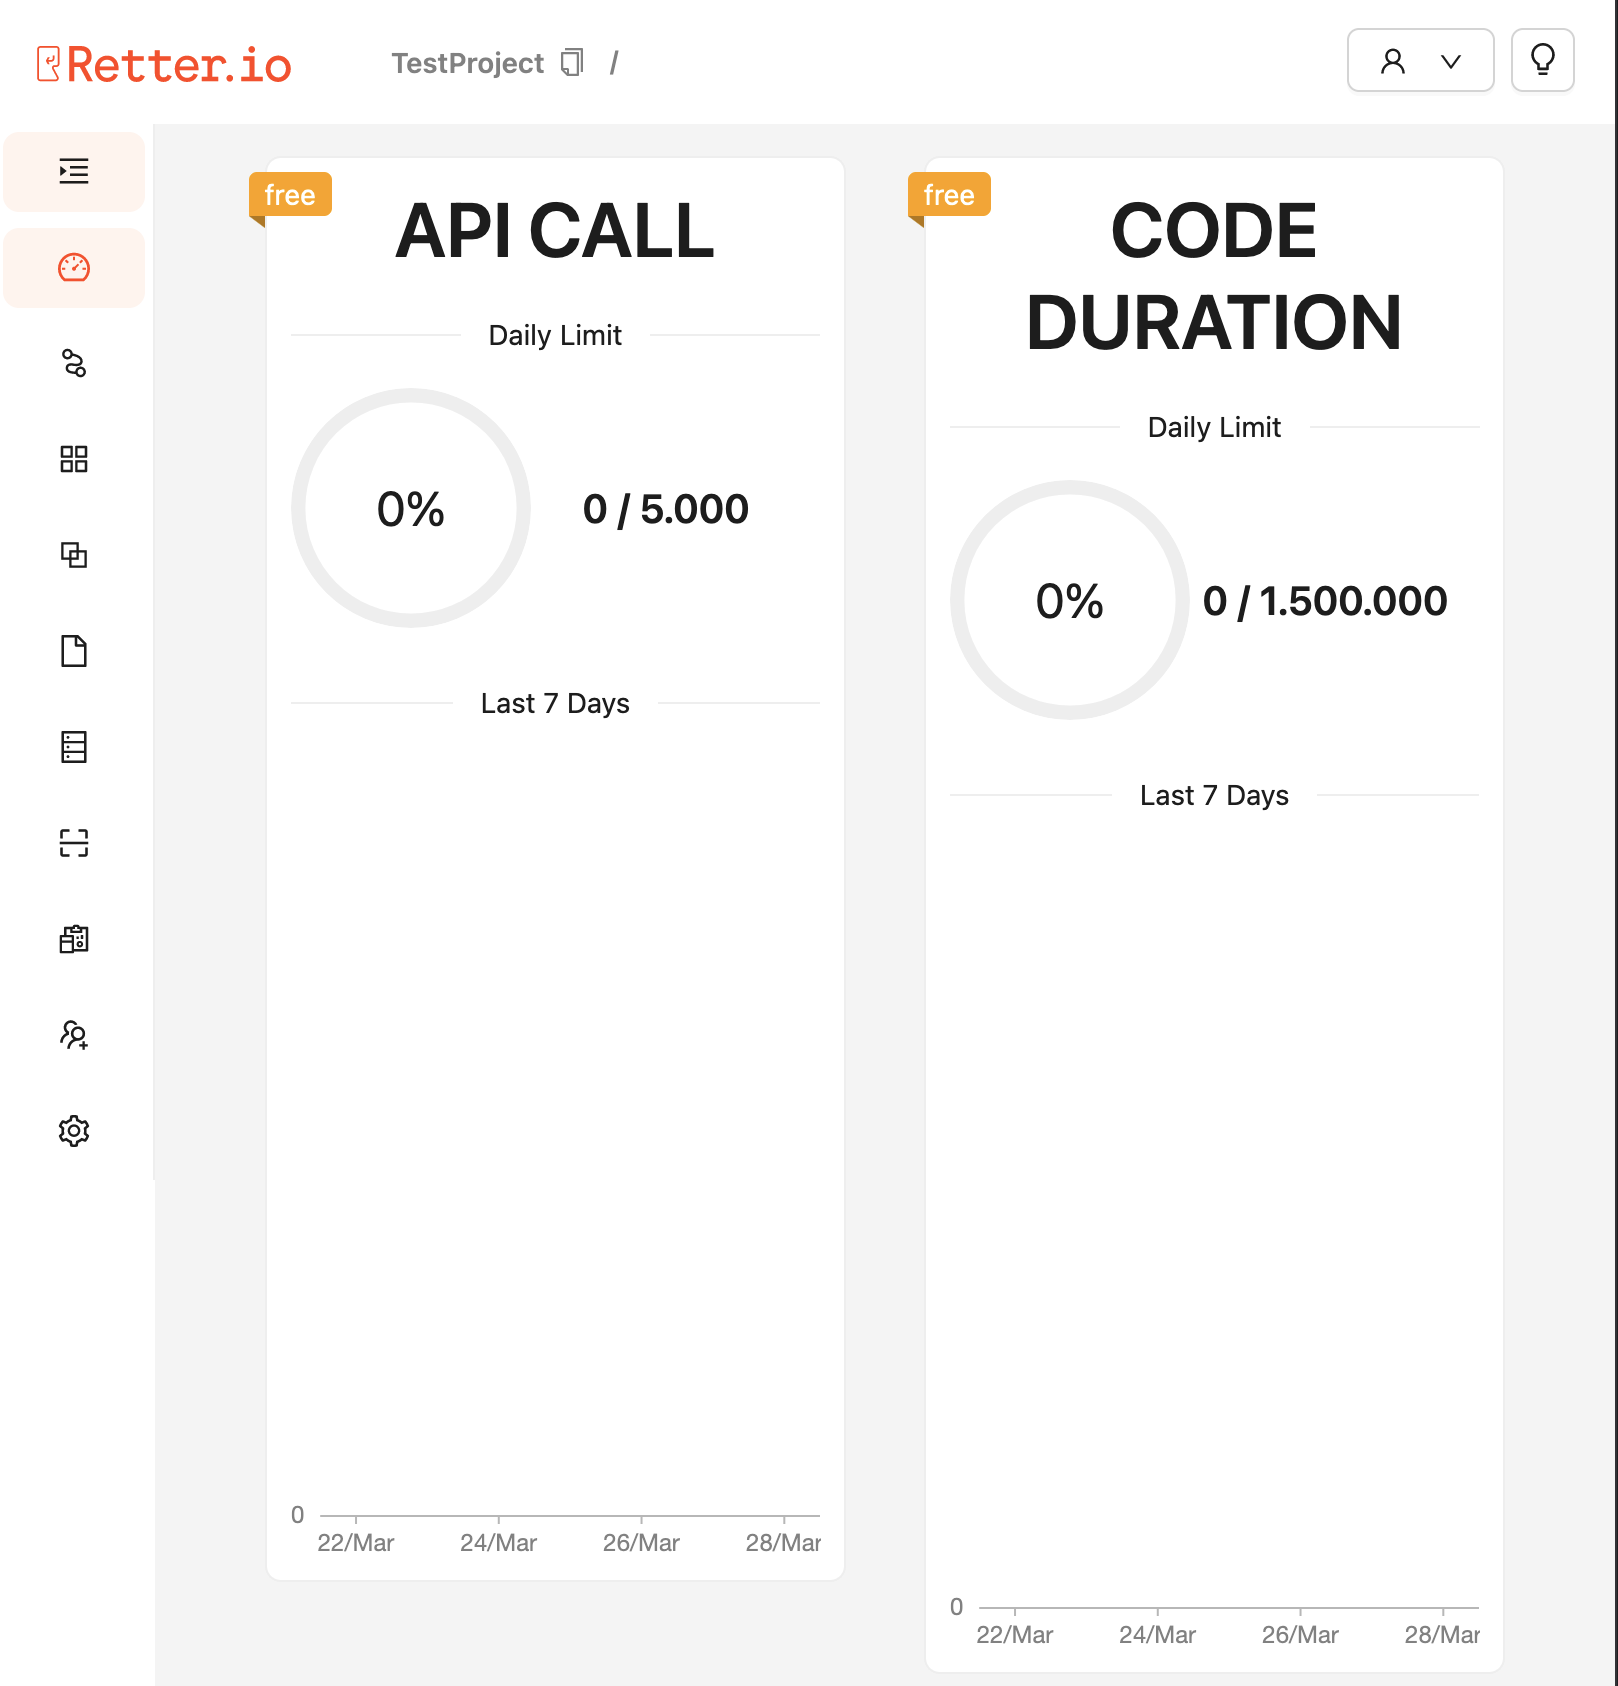
However, you cannot see your classes or models until you deploy your project. Once your project is deployed successfully, you can see them on the console as in the following screenshot.
Testing The APIs
As you can learn through the documentation, Rio builds HTTP API endpoints from your class definitions. You can call that API from HTTP client tools such as Postman. However, Rio also provides a simple UI to test your API endpoints with the valid payload in an efficient way.
If you click the Test button on top of the screen you will see an interface that looks like the following screenshot: On the Test page, you can place an initial payload and create a new instance as well as you can retrieve an existing one with a valid instance id.
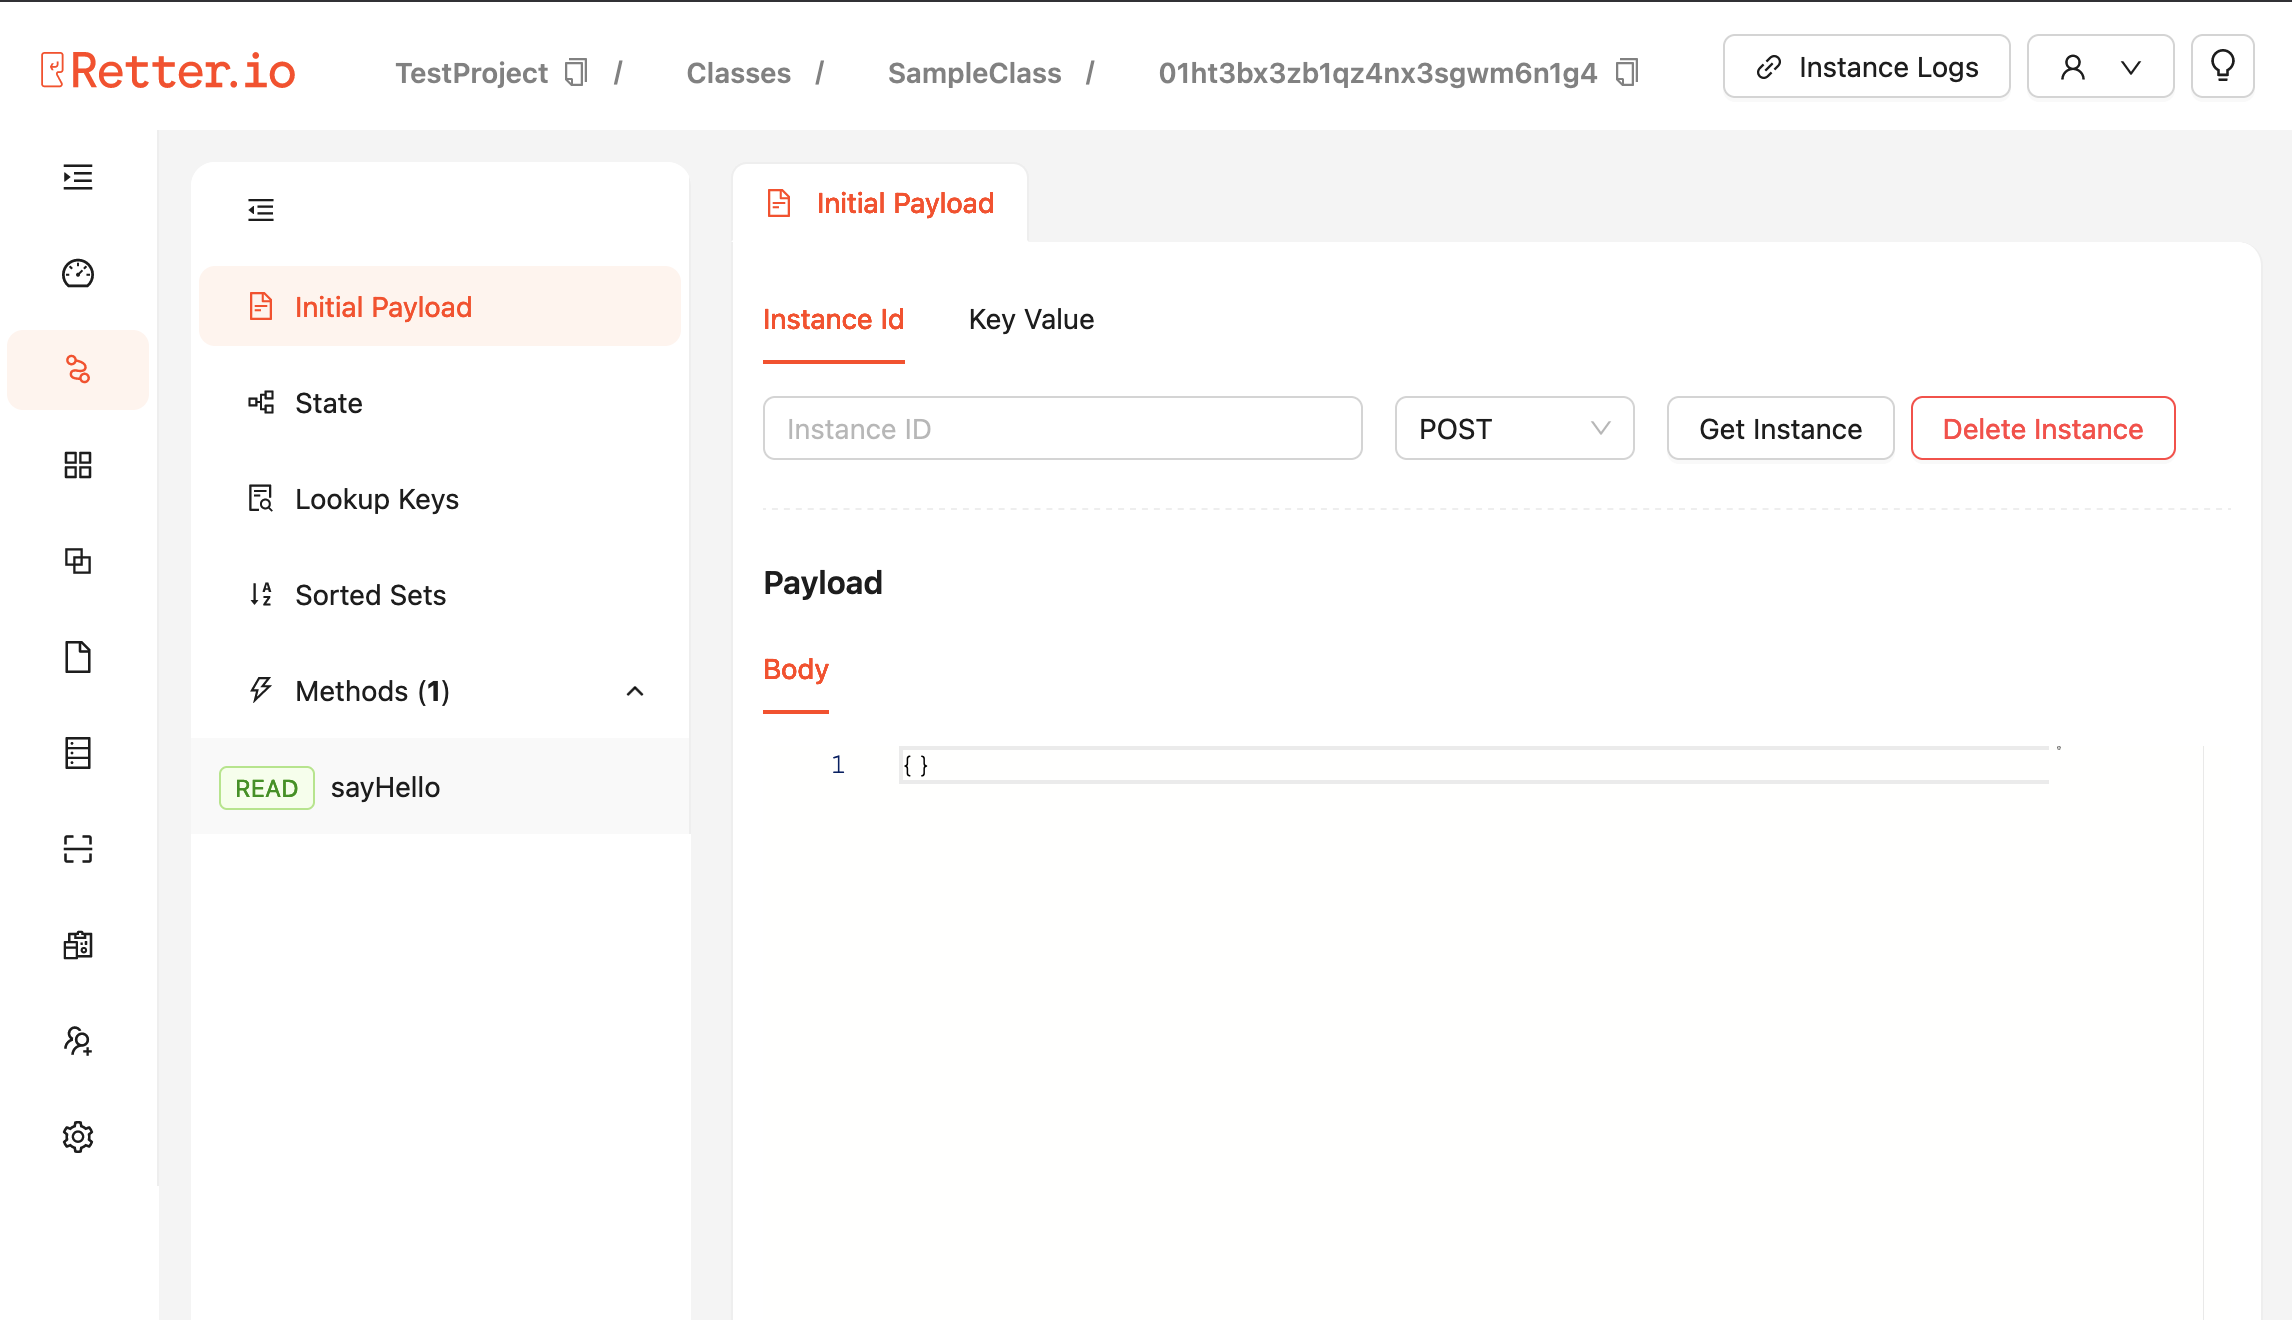
On the Instance page, you can call your existing methods with your customizable payloads and check the current state for possible changes according to your implementations.
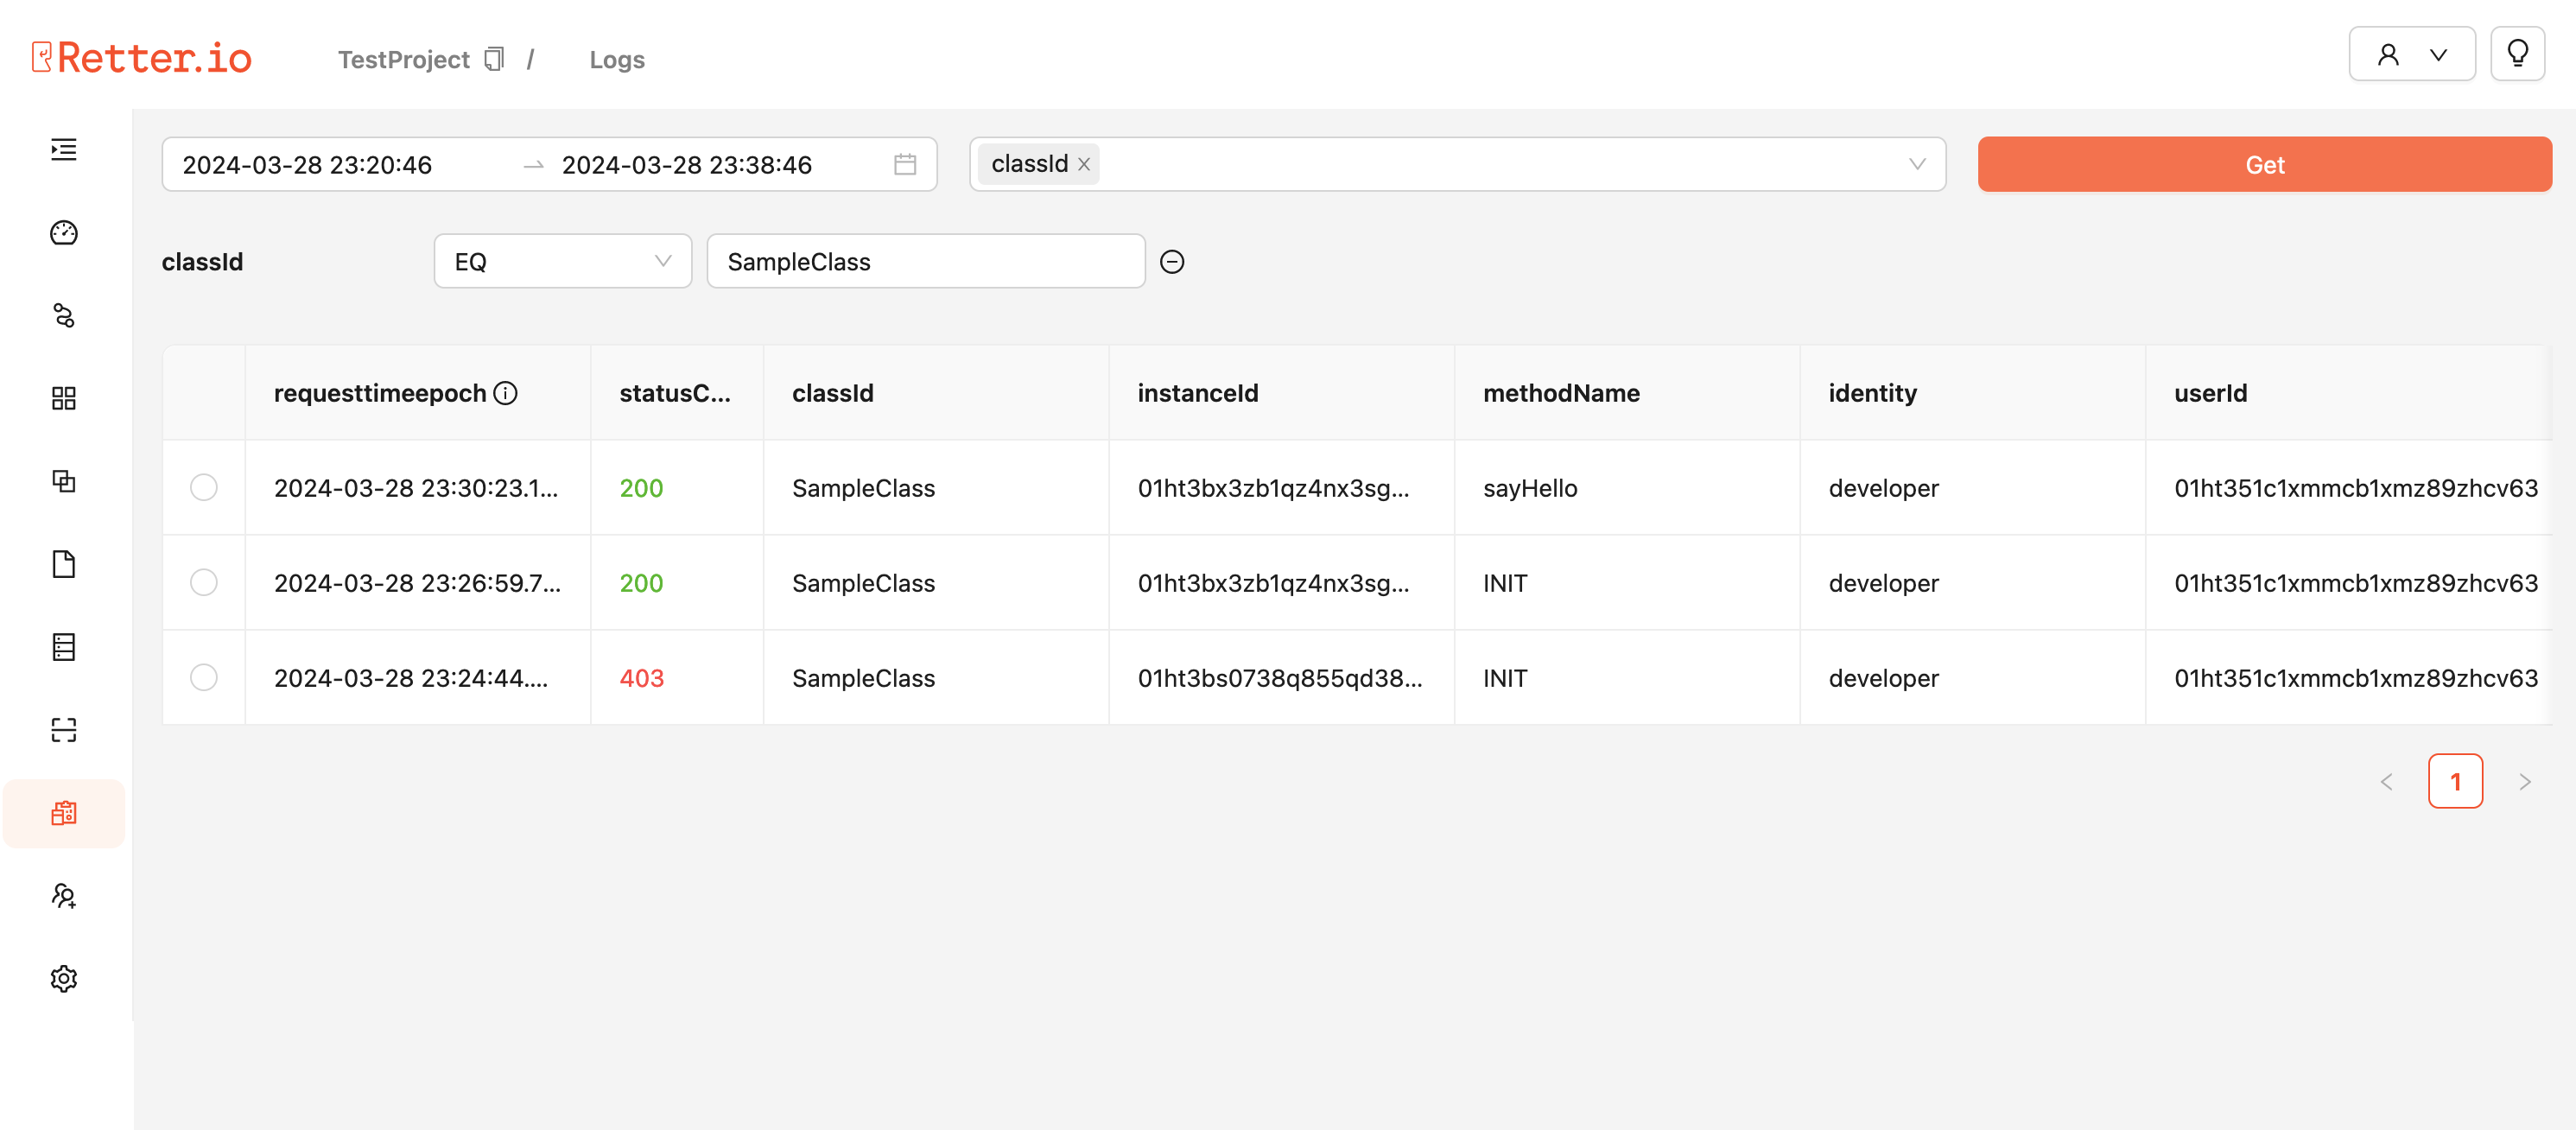
Working With The Logs
After making a few tests calls to the methods of your class, you can see the results also on the Logs page which you can access by clicking the Logs item from the menu on the left side of the screen.
It may take up to 60 seconds to see your requests on the Logs.
For more information about logs, please check Logs section at the Settings page.